
Are you tired of complicated skincare routines with harsh chemicals that leave your skin feeling irritated and lackluster? It’s time to simplify your routine and turn to a natural solution – essential oils. These powerful oils can work wonders for your skin, reducing inflammation, fighting blemishes, and revealing a radiant complexion. In this article, we’ll show you how to incorporate essential oils into the ultimate skincare routine for clear, glowing skin. Follow our six easy steps, and you’ll be amazed at the results. So, get ready to say goodbye to dull and hello to beautiful, healthy skin.,
Step 1: Cleanse with Oil
One of the most important steps in any skincare routine is cleansing. However, not all cleansers are created equal. If you’re looking for a natural alternative that can still effectively remove dirt, oil, and makeup, consider oil cleansing.

Oil cleansing involves using a blend of natural oils to dissolve impurities on the surface of your skin, without stripping away moisture. It may sound counterintuitive to use oil to cleanse oily skin, but the right oils can actually help balance your skin’s natural oil production and leave you with a clearer complexion.
To try oil cleansing, start by choosing a carrier oil, such as jojoba, sweet almond, or grapeseed oil. Then, add a few drops of essential oils with skin-boosting properties, like tea tree oil for acne-prone skin or frankincense oil for anti-aging benefits. Massage the oil into your face for a few minutes, using circular motions to stimulate circulation. Finally, gently wipe away the oil with a warm, damp washcloth.
Not only will oil cleansing leave your skin feeling soft and hydrated, but it can also help prepare your skin for the next step in your routine: toning with witch hazel.,
Step 2: Tone with Witch Hazel
Toning is an essential step in any skincare routine, and witch hazel can be a game-changer for keeping your skin clear, refreshed, and balanced. Witch hazel is a natural astringent that helps to remove any remaining traces of dirt, oil, and makeup, while also tightening and toning the skin.
To use witch hazel as a toner, simply soak a cotton pad in the solution and swipe it over your face, avoiding the eye area. It’s best to use witch hazel after cleansing in the morning and evening, but be careful not to overdo it as it can be drying if used excessively.
In addition to its toning properties, witch hazel also has anti-inflammatory and antibacterial properties, making it a great choice for acne-prone skin. It can also help to reduce the appearance of pores and soothe irritated skin.
After toning with witch hazel, it’s time to moisturize with jojoba oil. This lightweight, non-greasy oil is perfect for hydrating the skin without clogging pores or causing breakouts.,
Step 3: Moisturize with Jojoba Oil
After toning with witch hazel, it’s essential to moisturize the skin to keep it hydrated and supple. Using Jojoba oil is a great choice for this step. Jojoba oil is a non-greasy and lightweight oil that moisturizes the skin without clogging pores or causing breakouts.
Jojoba oil is rich in vitamins and minerals that provide nourishment to the skin. It’s also rich in antioxidants that protect the skin from environmental stressors. Jojoba oil is suitable for all skin types, but it’s especially useful for people with oily skin.
To use Jojoba oil, take a small amount and apply it to your face with gentle circular motions. Pay special attention to dry areas of your face like the cheeks and forehead. You can also mix Jojoba oil with your moisturizer to boost its hydrating properties.
Now that your skin is moisturized, you can move on to the next step: Spot treat with Tea Tree Oil.,
Step 4: Spot Treat with Tea Tree Oil
After hydrating your skin with Jojoba oil, it’s time to spot treat any blemishes with Tea Tree Oil. This essential oil has natural antibacterial properties that work to reduce inflammation and fight acne-causing bacteria. To use Tea Tree Oil, simply apply a small amount directly onto a pimple or problem area with a cotton swab. Be careful not to use too much, as it can be irritating to the skin.
Now that you’ve spot treated any problem areas, it’s time to detox your skin with a clay mask.,
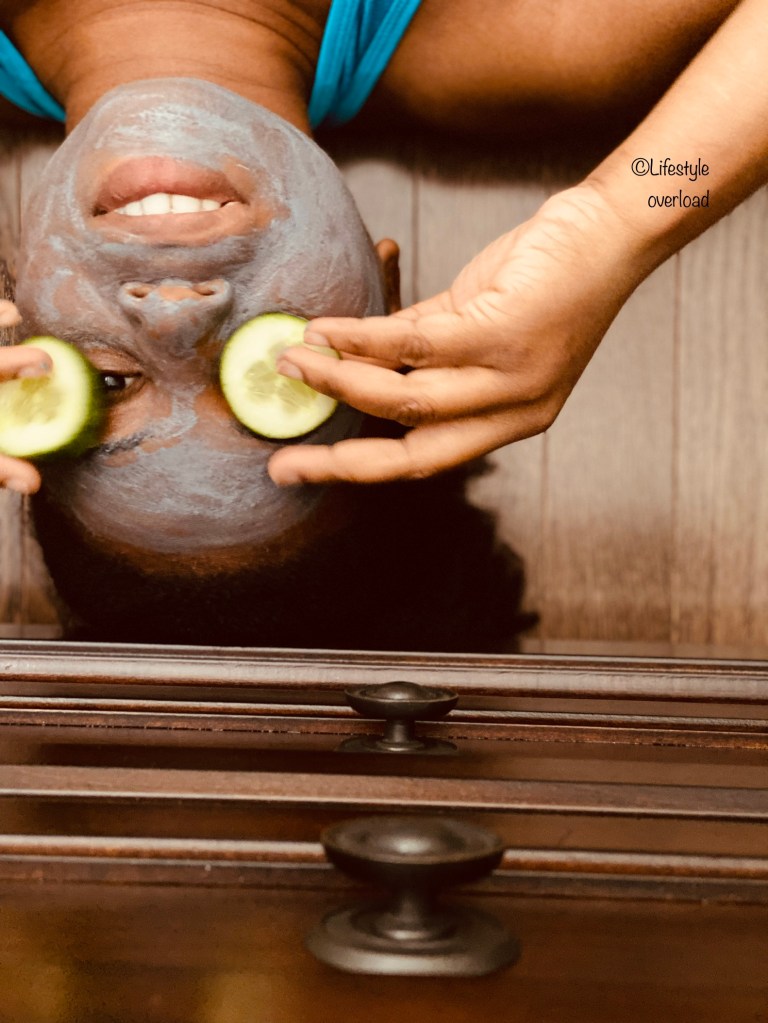
Step 5: Detox with a Clay Mask
After treating any blemishes, it’s important to give our skin a deep cleanse to get rid of any impurities and toxins. This is where a clay mask comes in. Clay masks are excellent at drawing out impurities and excess oil from the skin, leaving it feeling fresh and revitalized. Look for a clay mask that contains ingredients like bentonite, kaolin, or charcoal, which are known for their detoxifying properties.
To use a clay mask, apply a thin layer to your face and let it sit for about 10-15 minutes. It’s important not to let the mask fully dry out, as this can be too harsh on the skin. Rinse off the mask with warm water and follow up with your regular skincare routine.
By incorporating a clay mask into your skincare routine, you’re giving your skin the extra boost it needs to stay clear and glowing. Next up, we’ll discuss the importance of protecting your newly refreshed skin with sunscreen.,
Step 6: Protect with Sunscreen
As much as we love to soak in the sun, it’s important to remember that our skin needs protection. Sun damage can cause premature aging and increase the risk of skin cancer. That’s why applying sunscreen is an essential step in any skincare routine.
When choosing a sunscreen, look for one with broad-spectrum protection and an SPF of at least 30. Apply it generously to all exposed areas of your skin, including your face, neck, and hands. Reapply every two hours, or more often if you’re swimming or sweating.
Remember that sunscreen is not just for beach days – you should wear it every day, even if you’re mostly indoors. UVA rays can still penetrate windows and cause damage, so don’t skip this step in your morning routine.
By taking the time to protect your skin with sunscreen, you’re helping to prevent future damage and keep your skin clear and glowing. So go ahead and enjoy the sunshine – but don’t forget to protect your beautiful skin.

